If your car’s interior has started smelling musty or your air conditioner isn’t blowing like it used to, there’s a simple fix that most drivers overlook—the cabin air filter. Designed to trap dust, pollen, and road debris before it reaches your vents, this small but mighty filter plays a big role in keeping your ride comfortable and your air clean.
The good news? Replacing a cabin air filter is one of the easiest car maintenance tasks you can do yourself—and it usually takes less than 10 minutes. No mechanic required, no special tools, and the benefits are immediate: improved airflow, reduced odors, and cleaner air for you and your passengers.
In this guide, we’ll cover how to spot a clogged filter, the benefits of changing it, and quick DIY steps to get the job done properly.
How to Spot a Clogged Cabin Air Filter
Cabin air filters are out of sight—usually located behind the glove box or under the dash—so it’s easy to forget they exist. But just like your engine’s air filter, they get dirty over time and need regular replacement.
Here are the common signs your cabin filter needs replacing:
- Weak airflow through the vents – Even at high fan speeds, air feels faint or restricted.
- Persistent musty or stale odor – A dirty filter can trap moisture and mold, causing unpleasant smells.
- Increased dust on the dashboard – When the filter can’t trap particulates anymore, they end up inside your cabin.
- Allergy flare-ups while driving – If pollen or pollutants are sneaking past a clogged filter, you might feel it.
In most vehicles, the cabin air filter should be replaced every 12,000 to 15,000 miles—or once a year, depending on driving conditions. If you drive in a dusty or urban area, you may need to change it more frequently.
Keeping the cabin filter clean isn’t just about comfort—it also prevents strain on your HVAC system and blower motor.
And while we’re talking about airflow, don’t forget your engine’s air filter too. It protects your engine from dirt and contaminants and plays a direct role in fuel economy and throttle response. Both filters should be part of your regular maintenance routine.
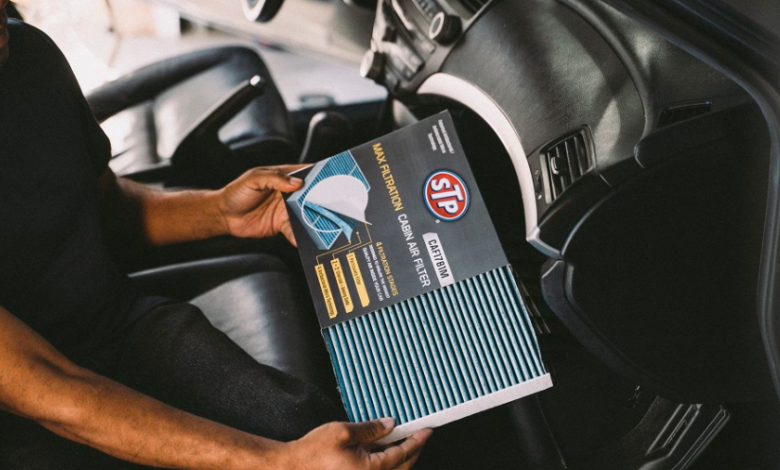
Quick DIY Steps to Replace It Properly
Replacing your cabin air filter is one of the most approachable car maintenance tasks you can do, even for beginners. Here’s a quick, step-by-step breakdown:
Step 1: Locate the Cabin Filter
In most vehicles, the cabin filter is located behind the glove box. Some are accessible under the dashboard or under the hood near the base of the windshield.
- Check your owner’s manual or search your vehicle’s make and model online to find the exact location.
- If it’s behind the glove box, you may need to unhook the box from its hinges or remove a few clips.
Step 2: Remove the Old Filter
Once you’ve accessed the filter compartment:
- Slide out the old filter gently to avoid scattering dust or debris.
- Take note of the airflow direction arrow—you’ll want to match this when installing the new one.
- If the filter looks dark, packed with leaves or dirt, or has a musty smell—it’s definitely time to replace.
Step 3: Clean the Filter Housing
Before inserting the new filter, take a moment to:
- Wipe down the compartment with a clean cloth or vacuum to remove loose debris.
- Check for moisture or signs of mold—if present, run the fan on high with the windows down after replacement to dry the ducts.
Step 4: Install the New Filter
Slide in the new filter with the airflow arrow pointing in the same direction as the old one. Make sure it’s seated correctly, with no gaps or bends.
- Reattach the glove box or cover panel.
- Turn on your fan to test for improved airflow. You should immediately notice a stronger, cleaner blast of air.
Need help picking the right filter? AutoZone’s fitment tool online or in-store associates can help you find the perfect match for your vehicle.
And while you’re already working on airflow systems, it’s worth checking your sensor MAF (Mass Air Flow Sensor) if you’re experiencing issues like poor acceleration or inconsistent idle. This sensor works alongside your air filter to help regulate your engine’s performance and fuel-air mix. Keeping both components clean ensures smoother driving and better fuel efficiency.
See also: Understanding Business Software and Its Strategic Role
Final Thoughts: Breathe Easier with a Fresh Cabin Filter
Changing your cabin air filter might not seem like a big deal—but it has a big impact. From better air quality to improved HVAC performance, this quick DIY job can drastically improve your driving experience—especially during allergy season or in polluted areas.
Best of all, it’s fast, inexpensive, and something almost anyone can do with no prior mechanical knowledge.
Need to replace air filter AC components like your cabin or engine filter? Want to keep your air system running at peak performance? AutoZone carries everything you need, including filters, cleaners, and sensor-friendly products for both airflow and fuel efficiency.
Let me know when you’re ready for your next article—we can dive into engine filter cleaning, mass airflow sensor maintenance, or a seasonal DIY car maintenance checklist for beginners.