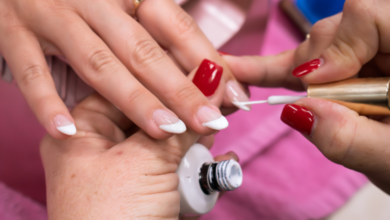
The permanent makeup industry is experiencing unprecedented growth, with more clients than ever seeking beautifully defined brows, flushed lips, and effortless everyday beauty. For new artists entering this exciting field, the creative possibilities feel limitless — but so does the confusion surrounding equipment choices. Walk into any beauty supply store or browse online retailers, and you’ll encounter dozens of machines, each promising professional results. How do you separate marketing hype from genuine quality? Which device will help you develop steady hands and precise technique without compromising client safety?
This guide cuts through the noise to help aspiring permanent makeup artists make informed decisions about their most important investment: the machine itself. Whether you’re drawn to microblading, powder brows, or lip blushing, selecting the right permanent makeup machine from the start can accelerate your learning curve, build client confidence, and establish the foundation for a thriving career. Let’s break down exactly what you need to know before making that first purchase.
Demystifying the Permanent Makeup Machine: Core Concepts for Beginners
A permanent makeup machine is a specialized device designed to implant pigment into the upper layers of the skin — specifically the dermal-epidermal junction — creating semi-permanent cosmetic enhancements. While it shares DNA with traditional tattoo equipment, the differences are significant. Permanent makeup machines operate at shallower depths, use finer needle configurations, and require more delicate speed and stroke settings to work safely on facial skin, which is thinner and more vascular than body skin.

The two fundamental machine types you’ll encounter are rotary and coil. Coil machines use electromagnetic circuits to drive the needle bar, producing a buzzing motion that experienced tattoo artists know well. However, most permanent makeup professionals have moved toward rotary machines, which use a small motor to create smooth, consistent needle movement. Rotary devices run quieter, vibrate less, and offer more precise control over depth and speed — all critical advantages when working millimeters from a client’s eyes or on sensitive lip tissue.
Understanding this distinction matters because your permanent makeup machine directly influences pigment retention, healing outcomes, and client comfort. A device that delivers inconsistent needle depth can cause scarring or patchy results, while one calibrated for cosmetic work helps you build muscle memory and confidence from your very first practice session on latex skin.
Your First Machine: Key Criteria for Selecting a Tattoo Machine for Brows
When choosing your first tattoo machine for brows, weight and ergonomics should top your priority list. You’ll spend hours holding this device at precise angles, so anything over 150 grams will fatigue your hand and introduce unwanted tremor into your strokes. Look for a pen-style machine with a slim grip diameter that feels like a natural extension of your fingers — this design allows the wrist movements needed for hair-stroke techniques and detailed shading work.
Adjustable speed and stroke length separate a learning-friendly machine from one that will frustrate you. For brow work, you need a device offering speeds between 6,000 and 12,000 RPM with a short stroke length (typically 2.5mm to 3.0mm) that gives you pixel-level control over pigment placement. Voltage stability matters equally; a machine that fluctuates under pressure will deposit pigment unevenly, leaving you with blotchy results that erode client trust. Quality power supplies with digital displays help you maintain consistent output throughout each session.
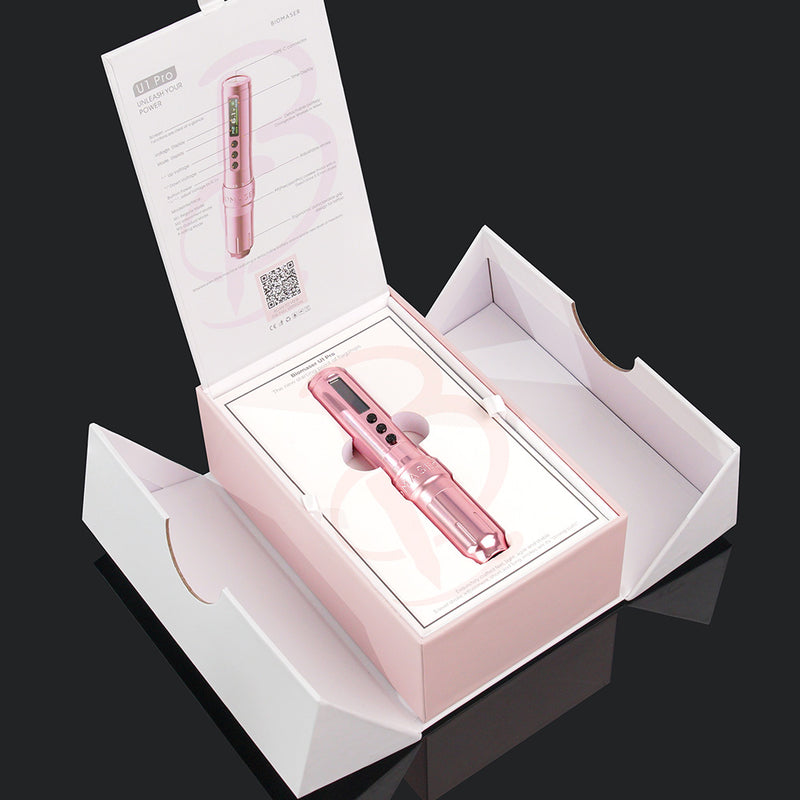
Needle cartridge compatibility deserves careful attention. Universal cartridge systems give you flexibility to experiment with different configurations — from single needles for crisp hair strokes to shader groupings for ombre effects — without being locked into a single brand’s ecosystem. Entry-level machines often come in kits with basic cartridge selections, which work fine for training on practice skins. However, investing slightly more in a mid-range professional model from brands like Biomaser typically delivers better motor longevity, smoother needle action, and the kind of reliable performance that translates directly into cleaner work as your skills develop. The machine you train on becomes the machine your hands understand, so choose one capable of growing with you through your first year of practice and beyond.
Technique-Specific Tools: Mastering Powder Brows and Lip Blushing
Once you’ve selected a reliable machine, the next step is understanding how different techniques demand specific tool configurations. Powder brows and lip blushing represent two of the most in-demand services for new artists, and each requires a tailored approach to equipment setup and needle selection.
Essential Tools for the Powder Brows Technique
The powder brows technique creates a soft, airbrushed effect that mimics the look of filled-in brows with makeup — no individual hair strokes, just a gentle gradient of color that’s denser at the tail and lighter toward the front. To achieve this diffused finish, you’ll want a rotary machine set to moderate speed (around 8,000–10,000 RPM) with a short stroke length that allows rapid, controlled pixelation of pigment into the skin. Needle choice is critical here: round shader configurations ranging from 3RL to 5RL nano needles work beautifully, depositing tiny dots of pigment that blend into that coveted powdery appearance. Some artists prefer curved magnum configurations for broader shading coverage. Keep your hand movement circular or stippling-based rather than linear, and select pigments one to two shades lighter than the desired healed result, since the technique builds density gradually across multiple passes.
Optimizing Your Toolkit for Lip Blushing
Lip blushing enhances the natural lip color with a wash of pigment, creating fuller-looking, evenly toned lips without the harsh line of traditional lip liner tattoos. This procedure demands extra sensitivity from your equipment because lip tissue is highly vascular, prone to swelling, and significantly more painful for clients than brow work. Set your machine to a gentler speed range (6,000–8,000 RPM) with a slightly longer stroke to ensure pigment implantation without excessive trauma. Round shader needles in 3RL or 5RL configurations allow you to work the vermillion border with precision while filling the lip body smoothly. A machine with minimal vibration helps you maintain control across the uneven lip surface. Choose pigments specifically formulated for lips — these account for the way lip tissue heals differently, often cooler — and always work in light layers, building saturation gradually rather than forcing pigment in a single aggressive pass.
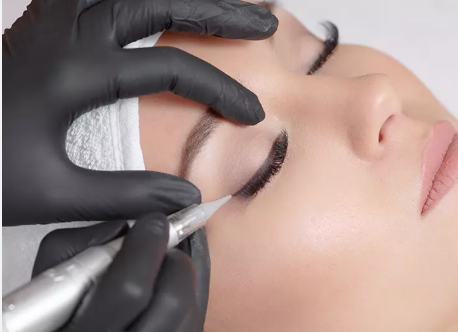
Non-Negotiable Safety: Investing in and Using Skin-Safe Devices
No amount of artistic talent compensates for compromised safety. As a new permanent makeup artist, you’re performing an invasive procedure that breaks the skin barrier, which means every tool touching your client must meet strict hygiene and biocompatibility standards. A skin-safe device starts with its construction materials — medical-grade stainless steel or aircraft-grade aluminum housings resist corrosion and withstand repeated disinfection without degrading. The machine’s grip section should be either autoclavable or designed to accept disposable barrier sleeves that prevent cross-contamination between clients.
Consistent mechanical performance is itself a safety feature. A machine that suddenly surges in speed or needle depth mid-procedure can puncture too deeply, causing scarring, excessive bleeding, or pigment migration into unintended skin layers. Before every session, test your machine on practice skin to confirm stable operation at your chosen settings. Verify that needle cartridges seat firmly without wobble — a loose cartridge creates micro-tears and introduces unpredictable trauma to delicate facial tissue.
Your sterilization protocol should be systematic and non-negotiable. Before each client, wipe down all non-disposable surfaces with hospital-grade disinfectant, apply fresh barrier film to your machine and cord, and open cartridge packages only in the client’s presence to demonstrate sterility. Wear nitrile gloves throughout, changing them whenever you touch non-sterile surfaces. After the procedure, dispose of needles in a sharps container, sterilize reusable components according to manufacturer guidelines, and provide clients with written aftercare instructions covering wound care, sun avoidance, and signs of infection to watch for. These practices protect your clients’ health, your professional reputation, and your legal standing from day one.
Practical Roadmap: A Step-by-Step Guide for Your First Procedure
Your first real procedure will feel entirely different from practicing on latex skin, so having a structured workflow keeps you grounded and professional. Begin with a thorough client consultation at least 48 hours before the appointment — discuss expectations, review medical history for contraindications like blood thinners or autoimmune conditions, and perform a patch test with your chosen pigment behind the ear to rule out allergic reactions. Document everything with signed consent forms.
On procedure day, set up your workspace methodically. Calibrate your machine to the appropriate speed and stroke length for your chosen technique, then test it on practice skin to confirm consistent performance. Arrange your cartridges, pigments, numbing cream, and barrier supplies within arm’s reach so you never need to leave the client mid-procedure. After applying topical anesthetic and allowing adequate numbing time, begin your application with light, controlled passes — resist the urge to saturate on the first round. Work in sections, wiping away excess pigment frequently to assess your progress against the pre-drawn mapping.
After completing the procedure, blot the area gently, apply a thin layer of recommended healing balm, and walk your client through aftercare verbally while handing them printed instructions. Common beginner issues include uneven pigment retention, which typically results from inconsistent hand pressure or working too quickly. If you notice patchy areas during the session, slow your speed slightly and ensure your needle angle stays perpendicular to the skin surface. Uneven lines often stem from rushing — take breaks between passes to reset your focus and steady your hand.
Building Your Career with the Right Equipment and Practices
Choosing your first permanent makeup machine isn’t just a purchasing decision — it’s the foundation upon which your entire career will be built. The ideal device for a new artist balances lightweight ergonomics with reliable motor performance, offers adjustable settings that accommodate multiple techniques, and meets the safety standards your clients deserve. A versatile rotary pen-style machine with consistent voltage output and universal cartridge compatibility will serve you well whether you’re perfecting powder brows or developing your lip blushing skills.
Equally important is understanding that no machine compensates for inadequate technique knowledge or compromised hygiene protocols. Your commitment to mastering proper needle configurations for each procedure, maintaining rigorous sterilization practices, and following structured workflows from consultation through aftercare will distinguish you as a trustworthy professional in a competitive market. The artists who thrive long-term are those who invest in continuous education — attending advanced training courses, practicing new techniques on synthetic skin before offering them to clients, and staying current with evolving industry standards. Start with quality equipment, pair it with disciplined practice, and let your growing portfolio of beautiful, safely executed work speak for itself.