Visual content has always been central to how brands communicate, but for most of history, producing it required either significant budget or specialized skills. That equation has changed. The rise of the ai image generator has made it possible for marketers, designers, and entrepreneurs to create high-quality imagery from nothing more than a text description — in seconds, not days.
The technology has matured quickly. Early tools produced blurry, inconsistent outputs that were more novelty than utility. Today’s platforms deliver photorealistic renders, stylized illustrations, and everything in between, with enough consistency to use in professional contexts. The barrier to entry is low, but the gap between average results and genuinely useful output is real — and it comes down almost entirely to how you use the tool.
This guide covers the fundamentals: how these tools actually work, what separates a good prompt from a poor one, where AI image generation delivers the most practical value, and what to look for when choosing a platform. Whether you’re new to the category or looking to get more out of a tool you already use, the principles here apply across the board.
How an AI Image Generator Turns Text Into Visuals
At the core of every modern ai image generator is a type of machine learning model called a diffusion model. These models are trained on enormous datasets of image-text pairs, learning to associate visual patterns with language. When you type a prompt, the model doesn’t search a database — it generates a new image from scratch by gradually refining a field of random noise into a coherent visual, guided by your description.
What this means in practice is that the model is interpreting your words, not executing them literally. It draws on statistical patterns from its training data to decide what a “cinematic portrait of a woman in golden hour light” should look like — the composition, the color temperature, the depth of field. The more precisely your prompt maps to patterns the model has learned, the more predictable and useful the output becomes.
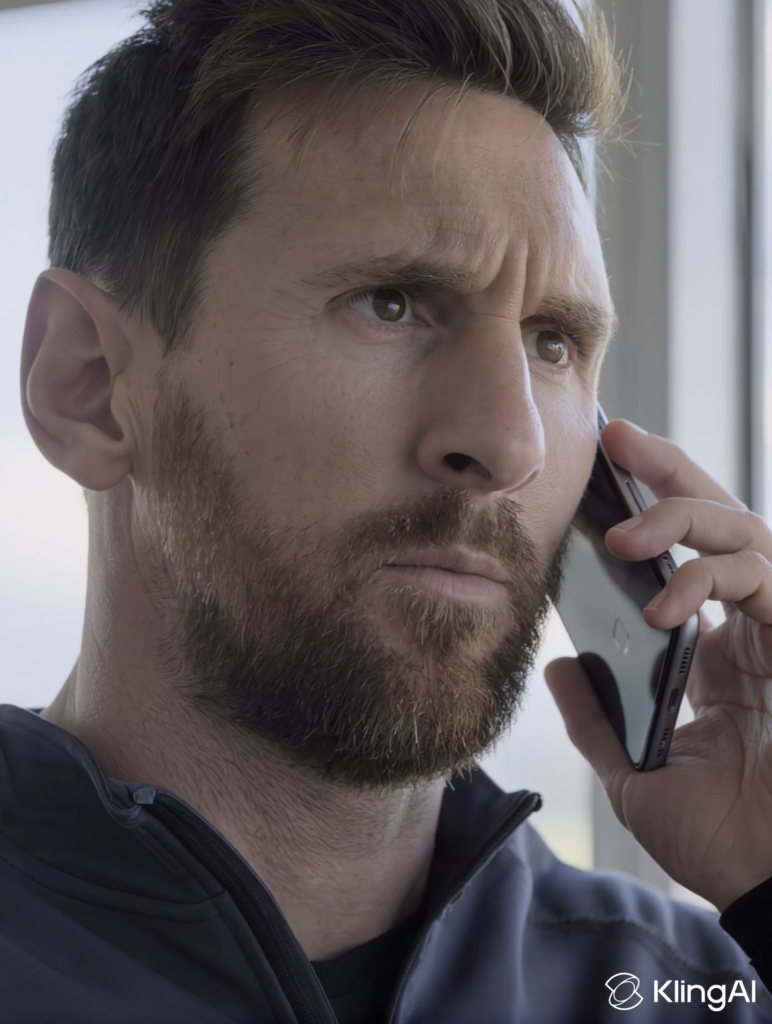
Three variables shape every output: subject (what the image depicts), style (the visual language it uses), and composition (how elements are arranged within the frame). Prompts that address all three consistently outperform those that only describe the subject. The best way to internalize how prompt changes affect output is to experiment directly — open a live ai image generator and test the same subject with three different style descriptors to see how dramatically the results shift.
Writing Prompts That Get Better Results
If there is a single skill that separates users who get consistently useful outputs from those who don’t, it’s prompt writing. Most people approach a text to image ai the way they’d type a search query — short, keyword-heavy, and vague. That approach works for search engines because they’re retrieving existing content. Image generation models are creating something new, and they need more to work with.
Be Specific About Style and Mood
Style descriptors are among the most powerful elements in any prompt. Adding a single word like “photorealistic,” “watercolor,” “flat design,” or “cinematic” fundamentally changes the visual language of the output. Mood descriptors — “dramatic,” “minimal,” “warm,” “melancholic” — shape the emotional register of the image in ways that subject descriptions alone cannot.
Compare these two prompts: “a coffee shop” versus “a cozy independent coffee shop, warm afternoon light, shallow depth of field, film photography aesthetic, muted earth tones.” The first gives the model almost nothing to work with beyond the subject. The second specifies style, lighting, mood, and color palette — and the output will reflect that specificity. The more your prompt reads like a creative brief, the more the output resembles intentional design work.
Include Composition and Lighting Details
Composition and lighting are the two elements most often missing from beginner prompts, and they’re the ones that most directly affect whether an image is usable in a professional context. Camera angle terms like “overhead shot,” “eye-level portrait,” or “wide establishing shot” give the model clear compositional direction. Lighting descriptors like “studio lighting,” “golden hour,” “backlit silhouette,” or “overcast diffused light” shape the entire mood and technical quality of the image.
For marketing and design applications, aspect ratio intent matters too. If you’re generating an image for a landscape banner, specifying “wide format, 16:9 composition” in your prompt (or using the tool’s aspect ratio settings) prevents the model from defaulting to a centered portrait composition that won’t work for your layout. Treating ai image creation as a directed creative process — rather than a slot machine — is what separates professional-grade outputs from generic ones.
Real Use Cases Where AI Image Generators Deliver Value
The technology is genuinely useful across a range of professional contexts, but it performs best when applied to specific, well-defined tasks. Here are the areas where the return on time invested is highest.
Marketing and Advertising Creative
For teams producing digital advertising, the best ai image generator for marketing use cases is one that can generate multiple visual variants quickly. A/B testing ad creative traditionally required either a designer’s time or a stock photo budget for each variant. With AI generation, a marketer can produce a dozen compositional and stylistic variations of the same concept in an afternoon, test them against each other, and iterate based on performance data — without waiting on a creative queue. Social media content, email headers, and display banners are all strong candidates for this workflow.
Product Visualization and E-commerce
Small businesses and independent sellers often lack the budget for professional product photography across their entire catalog. An ai image generator can produce lifestyle shots — showing a product in context, against a styled background, or in use — without a physical shoot. Background replacement and scene generation are particularly practical: a product photographed against a plain white background can be reimagined in dozens of lifestyle contexts, each tailored to a different audience segment or seasonal campaign. The output won’t replace high-end commercial photography, but for catalog depth and social content, it’s a significant capability unlock.
Design Concepting and Mood Boards
For designers, the value of an ai art generator in the early stages of a project is hard to overstate. Generating reference imagery for client presentations — showing three distinct visual directions for a brand identity, for example — used to require either sourcing stock images that only approximately matched the concept or commissioning illustration work before the direction was even approved. AI generation makes it possible to produce bespoke reference imagery that precisely matches the concept being pitched, in the time it takes to write a few prompts. Mood boards become faster to build and more accurate to the actual creative vision.
What to Look for in an AI Image Generator
Not all tools in this category are equivalent, and the right choice depends on your specific use case. A few criteria are worth evaluating before committing to a platform.
Output resolution and quality ceiling matter most for professional applications. Some tools cap outputs at resolutions that work for web but not for print or large-format display. If your use case includes anything beyond digital screens, verify the maximum output dimensions before you invest time in a workflow.
Style range and consistency determine how versatile a tool is across different projects. Some platforms excel at photorealistic outputs but struggle with illustration styles; others are the reverse. Platforms like Kling AI have expanded what’s possible in terms of style diversity and prompt fidelity, making them a practical choice for professional workflows that span multiple visual registers.
Prompt flexibility versus guided interfaces is a real tradeoff. Some tools offer highly structured interfaces with dropdowns and sliders that make it easy to get decent results quickly but limit how precisely you can direct the output. Open prompt interfaces give experienced users more control but have a steeper learning curve. Consider which end of that spectrum matches your team’s comfort level and the complexity of your use cases.
Finally, commercial usage rights vary significantly across platforms. Before using AI-generated imagery in paid advertising, product packaging, or any commercial context, verify that the platform’s terms of service explicitly grant commercial rights to outputs. This is a non-negotiable consideration for business use.
Common Mistakes That Hurt Your AI Image Results
Most disappointing outputs trace back to a small set of recurring errors. Recognizing them is the first step to avoiding them.
The most common mistake is prompts that are too short or too abstract. “A person in a city” gives the model almost no useful direction. The model will make every ambiguous decision itself, and the result will be generic. Specificity is not optional — it’s the mechanism by which you direct the output.
Ignoring negative prompts is another frequent oversight. Most platforms allow you to specify what you don’t want in the image — blurry backgrounds, extra limbs, watermarks, oversaturated colors. Using negative prompts to exclude common failure modes dramatically improves consistency, especially for photorealistic outputs where anatomical errors and lighting artifacts are most noticeable.
Treating the first output as final is perhaps the most limiting habit. AI image generation is an iterative process. The first result is a starting point, not a finished product. Adjusting one or two variables at a time — changing the lighting descriptor, adding a style reference, tightening the composition language — and regenerating is how you converge on an output that actually works. Tools like Kling AI allow rapid re-generation with adjusted prompts, which makes the iteration habit easier to build into your workflow.
Mismatching style keywords with subject matter is subtler but equally damaging. Applying “photorealistic” to a subject that doesn’t exist in the real world, or using “flat design” for a subject that requires depth and texture, creates outputs that feel incoherent. The style and subject need to be compatible — think about whether the style you’re specifying could plausibly be applied to the subject in the real world.
Finally, overlooking aspect ratio for the intended platform is a practical error that wastes generation cycles. A square output won’t work as a landscape banner; a portrait output won’t work as a YouTube thumbnail. Set the aspect ratio before generating, not after.
Getting the Most From Your AI Image Generator
The quality of your output from any ai image generator is determined more by how you use the tool than by which tool you choose. The platforms available today are capable of producing genuinely professional-grade imagery — but that capability is only accessible to users who understand how to direct it.
The three pillars covered in this guide are the foundation of that direction. Understanding how the model interprets your input tells you why specificity matters. Writing prompts that address style, mood, composition, and lighting gives the model the information it needs to produce intentional results. And applying the technology to the right use cases — marketing creative, product visualization, design concepting — ensures that the time you invest translates into real workflow value.
The tools in this category are improving rapidly. Output quality, style consistency, and prompt fidelity are all advancing at a pace that makes today’s limitations temporary. The users who will benefit most from those improvements are the ones who build the habit of working with these tools now — learning the language of prompts, developing an eye for what works, and integrating AI image creation into their existing creative process. Start with one use case, iterate on your prompts, and let the results guide where you go next.